Raspberry Pi Safe Shutdown Using NESPi Case
Use this to safely shutdown your Raspberry Pi
Read my profile at https://hadna.space
By default, there is no power button in the Raspberry Pi. The only way to safely shut it down is either to clicking the shutdown button (from a desktop environment) or sending a shutdown signal through SSH.
Yes, you can just directly unplug the power cable as well, but I won’t recommend you to do such inhumane way. One of the best solution (in my opinion) is by using this NESPi Case.
What is NESPi Case?
I just bought this NESPi Case for my Raspberry Pi 3 Model B that I own since 2017. I use this NESPi Case to replace the official Raspberry Pi case that I bought along with the Raspberry Pi. Nothing wrong with the old one, I just want a refreshment.
So, what exactly is a NESPi Case? NESPi Case is just another case for Raspberry Pi (specifically designed for Raspberry Pi 3 Model B+, Raspberry Pi 3 Model B, and Raspberry Pi 2 Model B) made by a company named Retroflag Tech Ltd., but the awesome things that make this case so special are: 1) the design; and 2) the power & reset buttons.
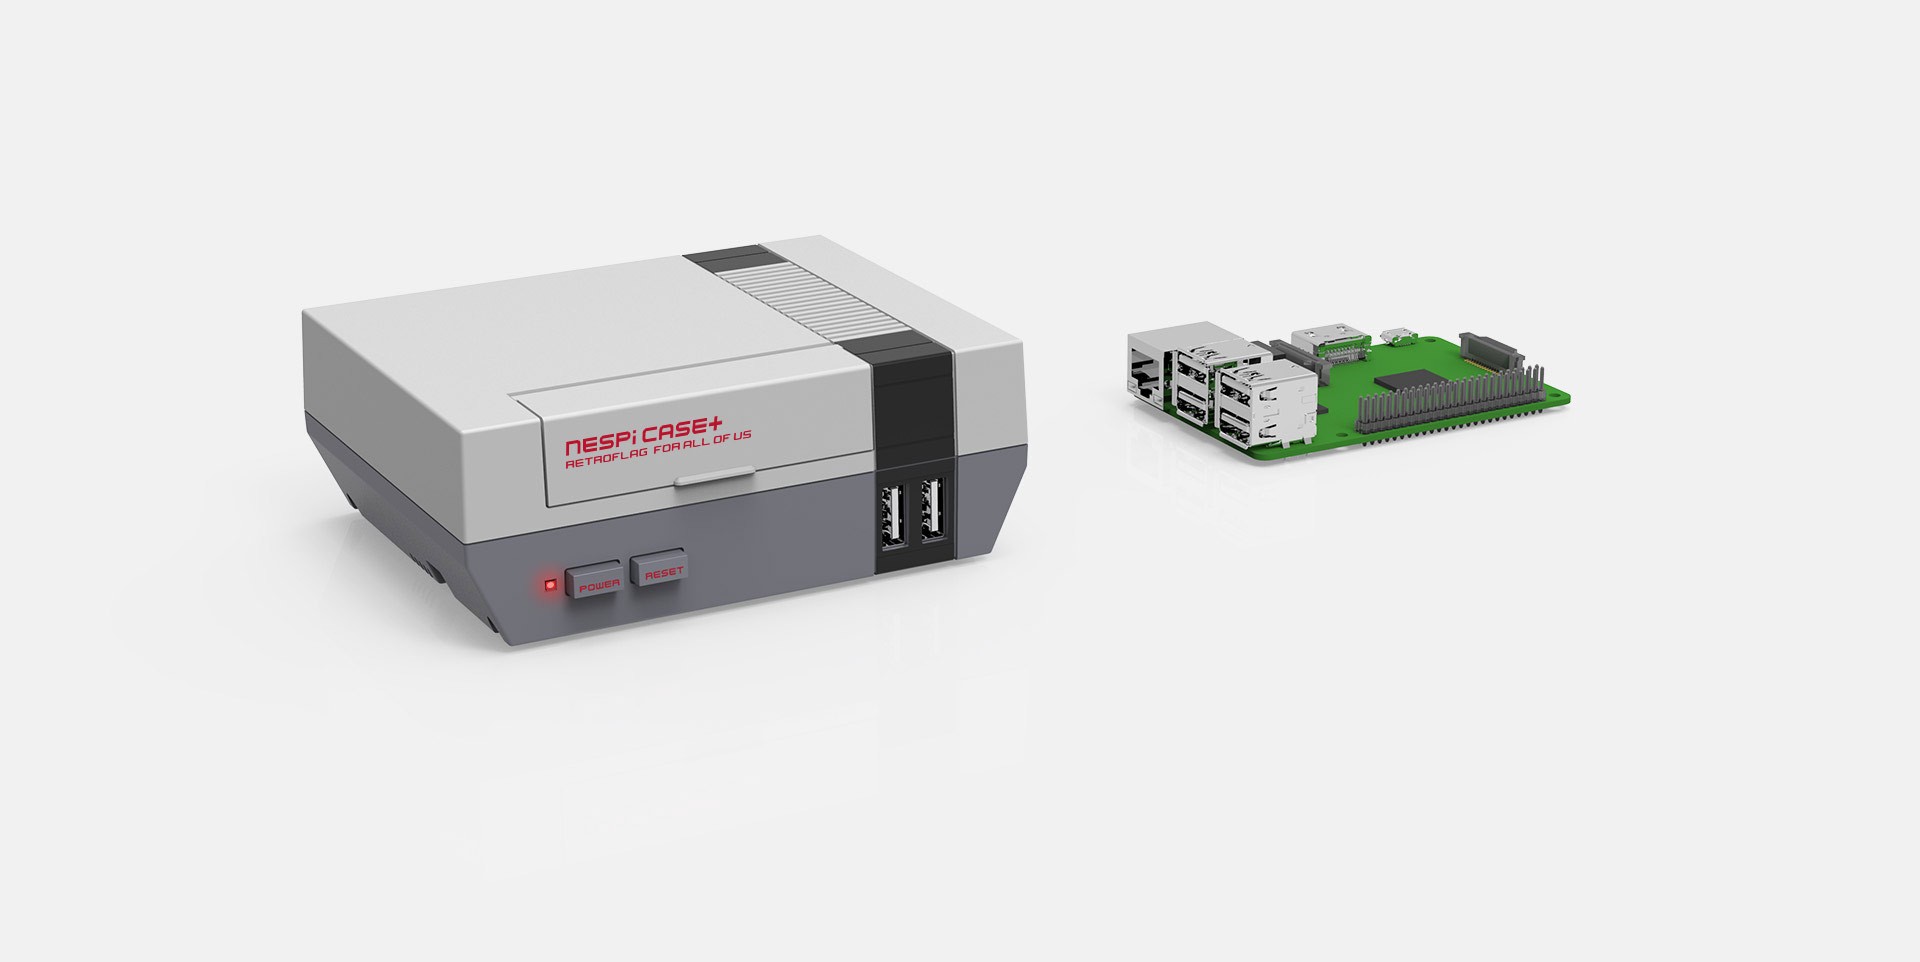 NESPi Case+ (image by Retroflag)
The design
NESPi Case is built by applying the most iconic element in the retro game world as a homage to the most classic console ever made, Nintendo Entertainment System (NES), hence the name is NESPi (a combination of NES and Raspberry Pi, I guess?)
It is obviously smaller compared to the original NES, but it is designed in such a way that it seems like the smaller version of the original NES where you can literally bring it everywhere easily. Not to mention that it brings my memories back in time when I was a child, spending my time playing games on this console (this is the main reason why I bought this, honestly).
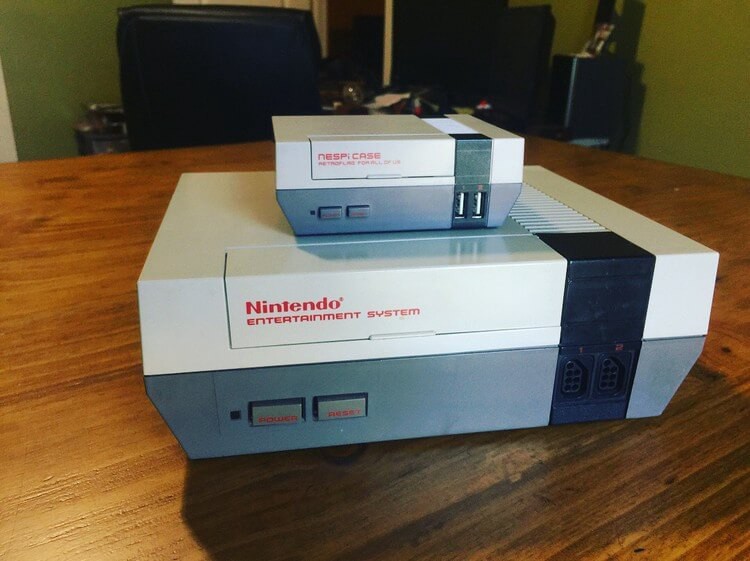 Original NES vs NESPi (image by TheCodingCouple.com)
The (functional) power & reset buttons
Another great thing in this case is Retroflag provides two buttons in the front side of this case. Not only act as accessory buttons, but they are functional buttons. They work as they intended! The LED next to the power button is working as well!
But all these buttons do not functional by default, you need to do some tweaking to your Raspberry Pi instead. I guarantee it is not a hard thing to do if you follow this article carefully. No soldering needed.
Hardware installation
If you open the NESPi Case, you will see some PCBs and three wires in it. Don’t be confused as the wires are mostly self explanatory. The first one is the ethernet cable, just plug it in the Raspberry Pi’s ethernet port. The second one is a USB cable where you can plug it in the Raspberry Pi’s USB port. The last one seems more complicated, but it is easy to install. Plug the connector in the outer side of the Raspberry Pi. You will get an installation manual (with images) when you purchase this case, so do not worry if you still have no idea how does it look.
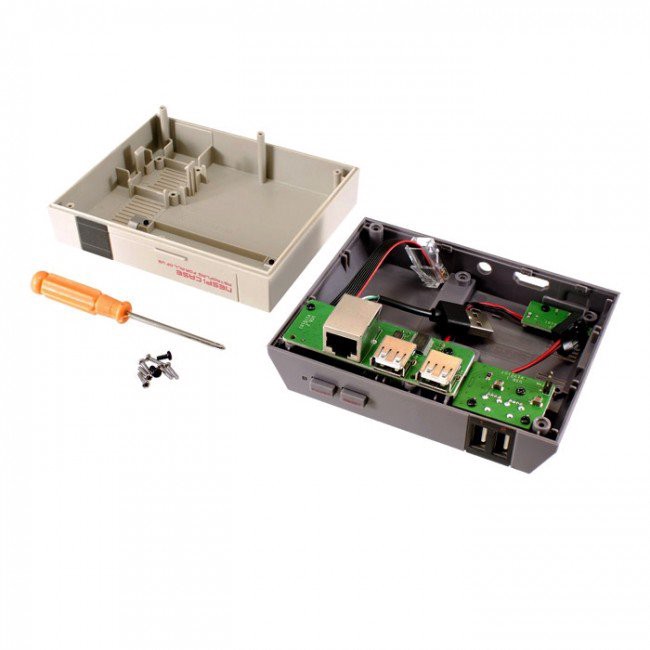 Inside the NESPi Case (image by core-electronics.com.au)
Software (script, actually) installation
As I mentioned earlier, there is no soldering needed. You may see another tutorial to make these buttons work with some soldering work, but in this article, you do not need it.
All you need to do to make the safe shutdown works is install a Python script which officially provided by Retroflag. Yes, they do not just sell the case, but also provide us with the script that will make the buttons work.
Let’s get to work:
Please make sure your Raspberry Pi connected to the internet.
Open the terminal and run this command
$ wget -O - "[https://raw.githubusercontent.com/RetroFlag/retroflag-picase/master/install.sh](https://raw.githubusercontent.com/RetroFlag/retroflag-picase/master/install.sh)" | sudo bash
- Your Raspberry Pi will restart when the installation successful.
All done! Your NESPi Case safe shutdown is now active and you can now use those button to safely shutdown (power button) or restart (reset button) your Raspberry Pi.
What exactly happened?
I tried to see what is going on when we install the script and see what the script does. So, here is what is going on:
Download the script.
Put the script in such way so it will automatically running when the Raspberry Pi boot up.
The script will monitor the button. If the power button is pressed, it will shut the Raspberry Pi down. If the reset button is pressed, it will restart the Raspberry Pi.
Now you have a fully working NESPi Case. Next, I am going to install RetroPie OS in my Raspberry Pi and start playing retro games and bring my childhood back.
What’s yours?
This story is imported from my Medium; and the featured image in this post is edited using my Spotify Photo Filter which you can use for free from my Mini Product.